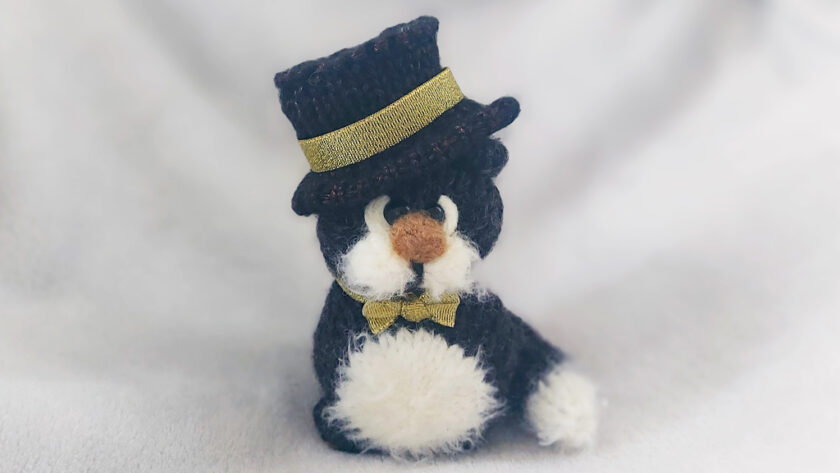
Want to add a little extra character to your amigurumi? This loom-knitted mini top hat is a simple and enjoyable project. I first designed this little top hat while knitting accessories for Arthur, my tuxedo cat. The shape and size turned out to be just right for amigurumi, so I decided to turn it into a simple loom-knitting pattern anyone can follow. This tutorial uses a 24-peg round loom and is suitable for beginners. You can follow along with the video tutorial.
Watch the full YouTube tutorial here:
What you’ll need
- 24-peg round loom
- Bulky or medium weight yarn
- Loom hook
- Yarn needle
- Stitch markers
Step 1: Cast On
- Take your 24 peg loom and cast on all 24 pegs using the drawstring cast-on method.
Step 2: Knit the top of the hat
- Knit 5 rows in the round.
- Purl row 6. This purl row creates an edge and finishes the top of the hat.
Step 3: Knit the body of the hat
- Knit 10 rows in the round to create the tall part of the top hat.
- Knit the last row loosely.
- This is important because these loops will be placed back on the loom later to form the brim.
- Optionally, you can use the e‑wrap stitch for this row. It creates looser loops, making them easier to place back onto the loom.
Step 4: Prepare for the Brim
- Place a stitch marker on each peg to mark the loops from the last row.
- Tip: Alternate stitch marker colors. This makes it easier to identify and place the loops back onto the loom when forming the brim.
Step 5: Knit the Brim
- Knit all loops with stitch markers. You can lift them over the pegs by hand or with a loom hook.
- Knit 7 more rows in the round.
- Carefully place the marked loops back onto the loom, starting with the first color and alternating.
- If some loops are tight, gently pull them up using your loom hook.
- Remove all stitch markers once the loops are back on the loom.
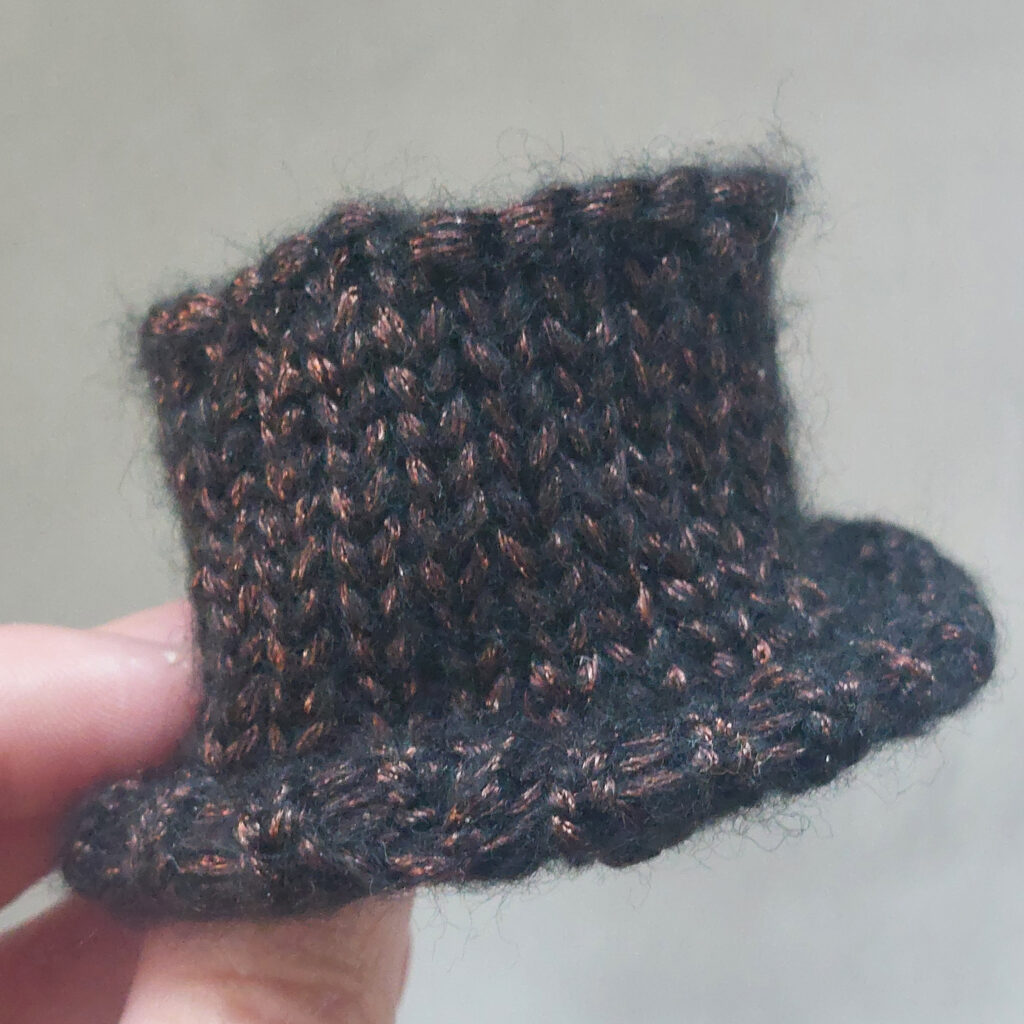
Step 6: Finish the Brim
- Knit off all pegs
- Bind off all pegs.
- Gently stretch the stitches to even them out.
Step 7: Finishing Touches
- Close the top of the hat using the drawstring.
- Secure it by threading the yarn through the top loops with a yarn needle.
- Weave in all loose ends on the inside of the hat.
- Shape the hat gently with your hands.
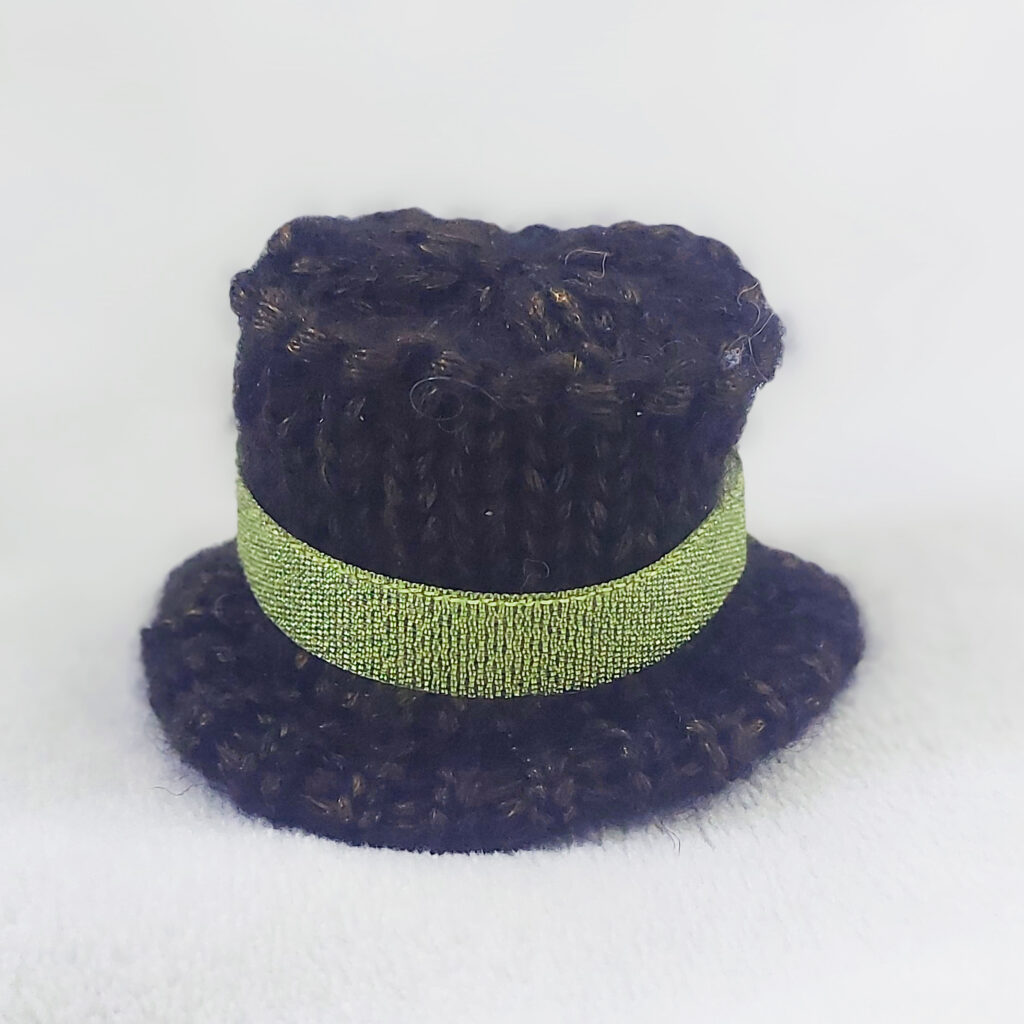
- Optional: Add a ribbon or band for a classic top hat look.
Your Mini Top Hat Is Finished
Your loom-knit top hat is now ready to style your amigurumi.